SpringCloud Consul 服务注册中心
参考资料 Consul Documentation 参考资料 Spring Cloud Consul 中文文档 参考资料 Spring Cloud Consul 服务注册与发现 参考资料 consul集群——docker-compose.yml
Consul 是什么?
在 Spring Cloud 中,大部分组件都有备选方案,例如服务注册中心,除了常见 Eureka 之外,还有 Zookeeper 和 Consul 等。 Consul 是 HashiCorp 公司推出来的开源产品,主要提供了服务发现、服务隔离、服务配置等功能。
相比于 Eureka 和 Zookeeper ,Consul 配置更加一站式,因为它内置了很多微服务常见的需求,比如:服务发现与注册、分布式一致性协议实现、健康检查、键值对存储、多数据中心等,我们不再需要借助第三方组件来实现这些功能。
配置环境
不同于 Eureka , Consul 使用 Go 语言开发,所以,使用 Consul ,需要先安装 Consul Server ,即服务注册中心。
这里照旧使用 Docker 来配置环境
编写一个 docker-compose.yml 集群环境
version: '3.3'
services:
  consul1:
    image: consul:latest
    container_name: consul1
    #restart: always
    command: agent -server -client=0.0.0.0 -bootstrap-expect=3 -node=consul1
    volumes:
      - ./consul1/data:/consul/data
      - ./consul1/config:/consul/config
  consul2:
    image: consul:latest
    container_name: consul2
    #restart: always
    command: agent -server -client=0.0.0.0 -retry-join=consul1 -node=consul2
    volumes:
      - .consul2/data:/consul/data
      - .consul2/config:/consul/config
  consul3:
    image: consul:latest
    container_name: consul3
    #restart: always
    command: agent -server -client=0.0.0.0 -retry-join=consul1 -node=consul3
    volumes:
      - ./consul3/data:/consul/data
      - ./consul3/config:/consul/config
  consul4:
    image: consul:latest
    container_name: consul4
    #restart: always
    ports:
      - 8500:8500
    command: agent -client=0.0.0.0 -retry-join=consul1 -ui -node=client1
    volumes:
      - ./consul4/data:/consul/data
      - ./consul4/config:/consul/config
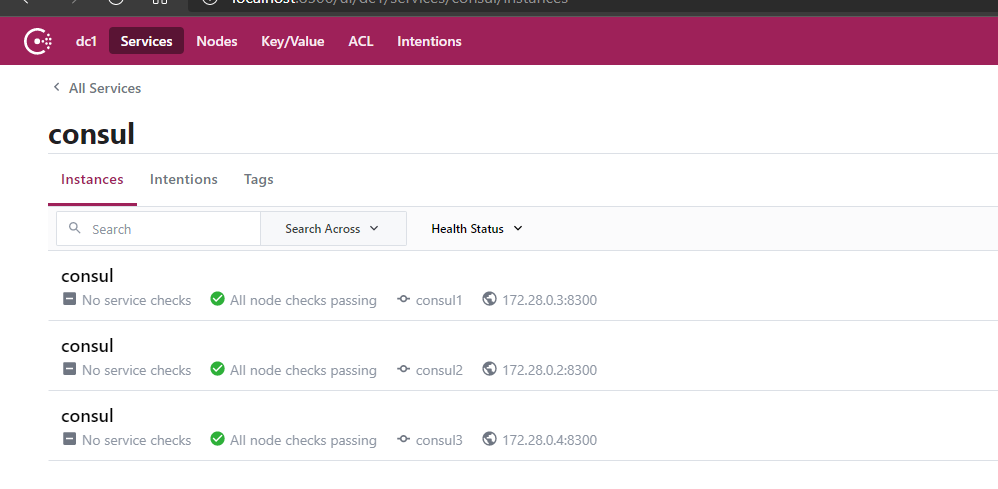
启动了 4个consul,其中consul1 是主节点,consul2、consul3 是子节点。consul4是提供ui服务的。
# 启动服务
docker-compose up -d
访问地址: http://localhost:8500 来查看集群信息
server 和 client 模式
server 模式和 client模式 都是 consul节点的类型(client 不是指用户客户端)
server 模式提供数据持久化功能。
client 模式不提供持久化功能,并且实际上他也不工作,只是把用户客户端的请求转发到 server 模式的节点。所以可以把 client 模式的节点想象成 LB(load balance),只负责请求转发。
通常 server 模式的节点需要配置成多个例如3个,5个。而 client 模式节点个数没有限制。
server 模式启动参数
# 表示当前使用的 server模式;如果没有指定,则表示是 client模式。
-server

# 指定当前节点在集群中的名称。
-node

# 指定配置文件路径,定义服务的;路径下面的所有.json结尾的文件都被访问;缺省值为:/consul/config。
-config-dir

# consul 存储数据的目录;缺省值为:/consul/data
-data-dir

# 数据中心名称,缺省值为 dc1
-datacenter

# 使用 consul 自带的 web UI界面 。
-ui

# 加入到已有的集群中。
-join

# 检查服务是否处于活动状态,类似开启心跳。
-enable-script-checks

# 绑定服务器的 ip 地址。
-bind

# 客户端可访问ip,缺省值为:“127.0.0.1”,即仅允许环回连接。
-client

# 在一个 datacenter 中期望的 server节点数目,consul启动时会一直等待直到达到这个数目的server才会引导整个集群。
# 这个参数的值在同一个datacenter的所有server节点上必须保持一致。
-bootstrap-expect
另外一个参数 -bootstrap,用来控制一个 server 是否运行在 bootstrap 模式:
当一个 server 处于 bootstrap 模式时,它可以选举自己为 leader;注意在一个 datacenter 中只能有一个 server 处于 bootstrap 模式。
所以这个参数一般只能用在只有一个 server 的开发环境中,在有多个 server 的 cluster产品环境中,不能使用这个参数,否则如果多个 server都标记自己为 leader那么会导致数据不一致。另外该标记不能和 -bootstrap-expect 同时指定。
导入依赖
<!--springcloud consul-server-->
<dependency>
    <groupId>org.springframework.cloud</groupId>
    <artifactId>spring-cloud-starter-consul-discovery</artifactId>
</dependency>

<dependency>
    <groupId>org.springframework.boot</groupId>
    <artifactId>spring-boot-starter-web</artifactId>
</dependency>

<!-- 这里最好加上这个状态检查 -->
<dependency>
    <groupId>org.springframework.boot</groupId>
    <artifactId>spring-boot-starter-actuator</artifactId>
</dependency>
配置服务生产者
# consul 服务端口号
server:
  port: 8006

spring:
  application:
    name: provider-payment
  # consul 注册中心地址
  cloud:
    consul:
      host: localhost
      port: 8500
      discovery:
        # hostname: 127.0.0.1
        service-name: ${spring.application.name}
        # healthCheckPath: /actuator/health # 可以手动设置检查路径
        healthCheckInterval: 15s
        prefer-ip-address: true # 注册过程使用 IP 而不是主机名,这个一定要开启!
        # hostname: 169.254.212.146:8006 #或者使用这个把 hostname 改成 IP 地址

# 开启状态检查
management:
  endpoints:
    web:
      exposure:
        include: "*"
  endpoint:
    health:
      show-details: always
编写一个 Controller
@RestController
@Slf4j
public class PaymentController {

    @Value("${server.port}")
    private String serverPort;

    @GetMapping(value = "/payment/consul")
    public String paymentConsul(){
        return "spring cloud with consul:"+serverPort+"\t"+ UUID.randomUUID().toString();
    }
}
最后别忘了在启动类加上 @EnableDiscoveryClient 注解
启动后就能在 UI 面板看到这个注册的服务了(如果没有配置上面那个健康检查,就会出现这个红叉)
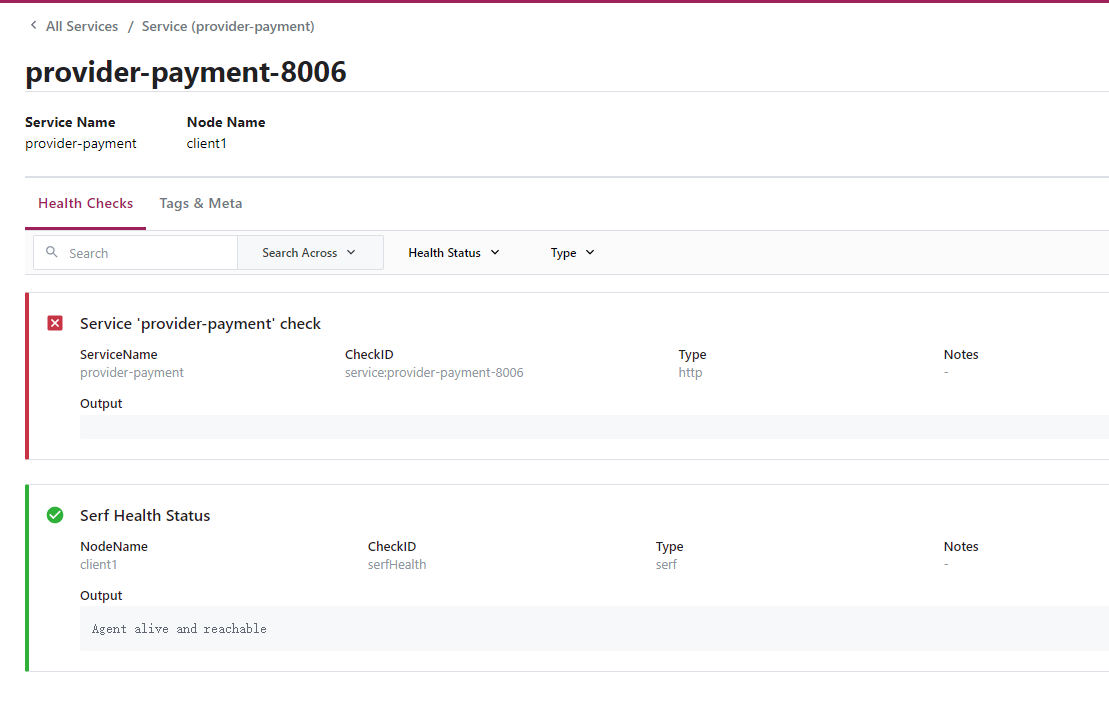
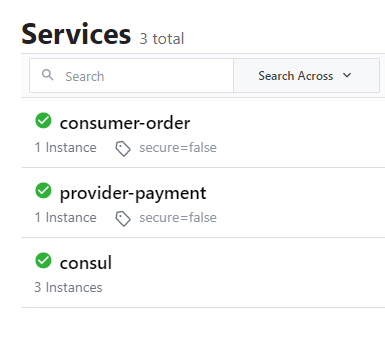
配置好的是这样的

配置服务消费者
# consul服务端口号
server:
  port: 8080

spring:
  application:
    name: consumer-order
  # consul服务注册中心
  cloud:
    consul:
      host: localhost
      port: 8500
      discovery:
        # hostname: 127.0.0.1
        service-name: ${spring.application.name}
        prefer-ip-address: true # 注册过程使用 IP 而不是主机名

management:
  endpoints:
    web:
      exposure:
        include: "*"
  endpoint:
    health:
      show-details: always
启动类
@EnableDiscoveryClient
@SpringBootApplication
public class ConsumerConsulOrder8080Application {

    @Bean
    @LoadBalanced
    public RestTemplate getRestTemplate(){
        return new RestTemplate();
    }

    public static void main(String[] args) {
        SpringApplication.run(ConsumerConsulOrder8080Application.class, args);
    }

}
创建一个 Controller 测试
@RestController
@Slf4j
public class OrderConsulController {
    public static final String INVOKE_URL = "http://provider-payment";
    @Resource
    private RestTemplate restTemplate;

    @GetMapping(value = "/consumer/payment/consul")
    public String paymentInfo(){
        return restTemplate.getForObject(INVOKE_URL+"/payment/consul",String.class);
    }
}
访问测试
http://localhost:8080/consumer/payment/consul
检查一下 Consul 当前已经有两个服务了